


Crazy Horse Leather Care: Clean & Condition Tips
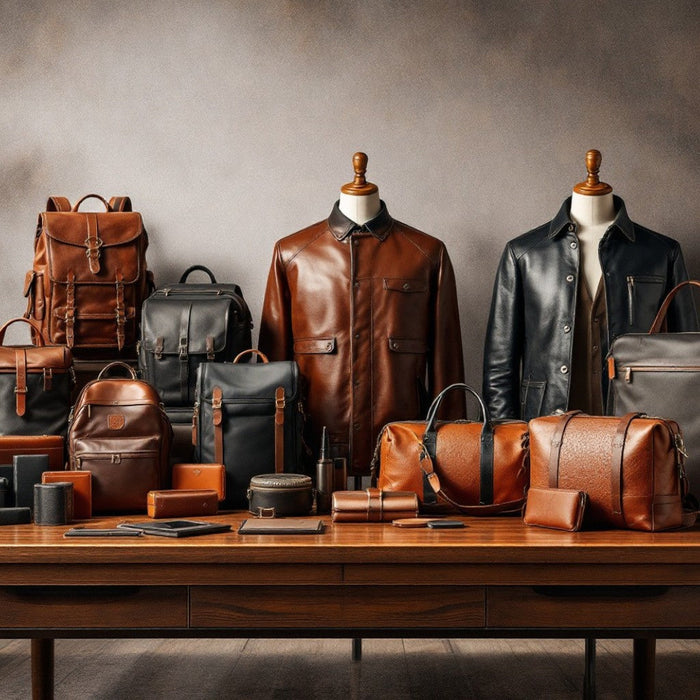
First things first: no horses are involved here. Despite the name—derived from its history in saddle-making—Crazy Horse leather is actually robust full-grain cowhide. If you're new to the material, you can learn more in our What is Crazy Horse Leather guide.
Its secret lies in a specialized process where wax is applied under heat, soaking into the fibers like water into a dense sponge. This wax-infusion defines the material's durability and makes crazy horse leather care distinct from standard maintenance.
Rather than masking imperfections, this wax layer creates a living finish where every scuff builds a vintage aesthetic. What looks like damage is often just wax shifting, allowing you to rub marks away with simple friction. Recognizing that this "distressed" look is intentional changes your approach to leather protection. You aren't just preserving a surface, but cultivating full grain leather character that improves with age.
What is the 'Pull-Up' Effect? Decoding Your Leather’s Color-Shifting Magic
Have you ever noticed that burst of lighter color when you fold your wallet or bend a bag strap? This color-shifting trait is technically called the "pull-up" effect, and it is a key difference between crazy horse leather vs oil tanned leather. Because the hide is saturated with specialized waxes, bending it physically pushes that wax out of the way. It’s similar to moving furniture in a carpeted room; shifting the heavy wax aside reveals the lighter, natural tone of the fibers underneath.
That mobility does more than provide a rugged look; it acts as a self-healing shield. Most "scratches" are simply displaced wax rather than structural damage to the skin. This high wax density also naturally repels water, keeping moisture from soaking in too quickly. You can often fix these marks just by rubbing them with your thumb; the friction creates heat, melting the oils back into place and restoring pull-up leather patina. With the wax structure understood, preventing surface dirt from ruining it becomes the priority.

The 30-Second Daily Routine: Preventing Grit from Eating Your Leather Fibers
While the wax coating acts as a shield, it can unintentionally trap dust and grit if left unchecked. This is dangerous because microscopic dirt particles act like sandpaper; every time you flex your leather bag, that grit grinds against the fibers, causing permanent damage. To prevent this "fiber abrasion," avoid stiff plastic scrubbers. Instead, rely on the natural softness of horsehair bristles. They are sturdy enough to dislodge debris but gentle enough to preserve the wax finish, making them perfect for buffing scuffs with a horsehair brush without adding new scratches.
You don't need a complex chemical kit for everyday care. A simple 30-second habit is highly effective for removing surface dirt from textured leather or even cleaning saddle leather boots after a long day:
- Dust: Quickly brush the entire surface to lift loose particles.
- Wipe: Run a dry, lint-free cloth over high-use areas like handles.
- Inspect: Look for lighter patches that indicate the leather needs conditioning.
Once the surface is clean, deeper marks that brushing won't fix require a different approach involving heat.
How to Erase Scratches and Scuffs Using Just Your Fingers and Heat
Seeing a bright, distinct scratch on your boots or bag often triggers immediate regret, but remember the "pull-up" effect discussed earlier. Because the color change comes from wax shifting away from the surface, you can often reverse the process by simply pushing that wax back into place. Here, how to remove scratches from waxed leather becomes incredibly intuitive: use your own body heat. By firmly rubbing your thumb in a circular motion over the scuff, you generate enough friction to slightly soften the wax coating, allowing it to flow back over the exposed fibers and darken the leather again.

Not every mark will disappear completely, and that is actually part of the charm. If a scratch remains lighter after rubbing, it has likely cut through the wax layer into the hide itself, but these deeper marks contribute to enhancing the vintage leather aesthetic rather than ruining it. Think of them as permanent character lines rather than flaws. However, while oils and friction handle physical scuffs, liquid spills require a very different approach to avoid permanent spots.
Safe Deep Cleaning: Removing Stains and Water Spots without Ruining the Finish
While your thumb handles scuffs, liquid spills require more than just friction. While waxed leather can get wet, spot-cleaning is risky. Scrubbing a single stain often creates a "clean ring" that looks worse than the original mark. The secret to fixing water spots on distressed leather is actually blending the moisture. Use a damp cloth to lightly moisten the entire panel (seam to seam) rather than just the dirty spot, ensuring the leather dries to a uniform color without visible edges.
For stubborn grime, you need a cleaner that removes dirt without stripping the essential wax infusion. Always choose a mild, pH-neutral leather soap and follow the strict "Air Dry Only" rule. Preventing leather fibers from cracking means avoiding hair dryers or radiators, which cook wet fibers until they turn brittle. To protect that rugged finish, never apply:
- Rubbing alcohol or hand sanitizer
- Bleach or ammonia-based cleaners
- Standard baby wipes
Once the leather is clean and fully dry, it will likely look lighter and ready for the right conditioner.
Choosing the Right Conditioner: Beeswax vs. Oils for Preserving Character
After cleaning, your item might look pale or feel dry. This is your signal to rehydrate, but applying too much product is a common mistake. While softening stiff full grain cowhide is vital to prevent cracking, over-conditioning can leave the surface feeling sticky and ruin the leather's ability to breathe. You want to replenish the fibers with a light touch, not drown them; think of this step as moisturizing dry skin rather than soaking a sponge.
The product you choose will also define the leather's future appearance. Pure oils soak in deeply to restore flexibility, often darkening the hide significantly, whereas wax-based creams offer a surface shield. When weighing neatsfoot oil vs mink oil for leather against a natural beeswax leather conditioner, use this guide:
- Mink or Neatsfoot Oil: Heavily darkens the leather; best for softening very dry, stiff items.
- Beeswax Creams: Provide surface protection and water resistance; maintain the original color tone best.
Your Action Plan for a Lifetime of Character
You no longer need to panic over every scuff; you now have the know-how to actively guide the aging process. To ensure the long-term durability of pull-up leather products, simply schedule a light conditioning session every six months. While specialized waterproofing treatments for distressed leather can help during heavy exposure, the leather’s natural wax usually handles the rest.
Five years from now, your gear will look richer than it does today. Rather than constantly restoring vintage look of full grain cowhide to a factory-perfect state, embrace the deepening patina as a badge of honor. You aren't just maintaining a product; you are curating a personal artifact that improves with every adventure.